
Summary
– Step 1: Choose the oil
– Step 2: Prepare the material
– Step 3: Unscrew the cap
– Step 4: Dispose of used oil
– Step 5: Remove the used filter
– Step 6: Clean
– Step 7: Screw the cap back on
– Step 8: Install the new filter
– Step 9: Fill the oil tank
– Step 10: Start the engine
– Step 11: Recycle your oil
Oil is used as a lubricant to promote friction between the different parts of an engine. With use, it deteriorates and takes on small metal parts due to wear. Changing and replacing oil is an essential part of maintaining engine life.
There are two ways to determine if your oil needs to be replaced:
Either you respect the manufacturer’s recommendations between 10,000 and 30,000 kilometres or the time variable every year.
– Either you decide that depending on your use (city, racetrack, or highway), you should change your oil at your own pace every 15,000 kilometres or every 6 months, for example.
Here’s how to change your car’s oil.
1. Choose the right oil
Where to buy motor oil?
There are several options available to you when changing your oil:
– Either you opt for the brand recommended by the manufacturer, knowing that it has no more virtue than the others but makes a partnership between the two companies.
– Either you buy your oil from any dealer, retailer, or on the Internet via merchant sites.
The viscosity of motor oil
Always choose an oil that meets the manufacturer’s recommendations for SAE viscosity. It is established by the Society of Automotive Engineers and determines the flow resistance of the oil to temperature:
– The first digit specifies the cold viscosity (0 is usable at -30 °C);
– the W stands for Winter;
– and the second digit gives the hot viscosity.
However, it should be noted that these 2 digits are not defined with the same scale when making measurements. Finally, although it is possible to use any oil, each engine is developed according to specific criteria, so they must be observed.
2. Prepare the equipment
– Make sure you have the right gasket, oil, and tools.
– Run your car’s engine for a few minutes to make the oil run more smoothly.
– Then move to a flat spot. If you have a pit in your garage, this is ideal. Otherwise, mount your car on four candles.
– Remove the undercarriage cover.
– Locate the drain plug.
– Place the drip tray under the car.
– Unscrew the plug.
– Wear protective gloves.
– Unscrew the drain plug with a pipe wrench or open-end wrench at the correct pitch.
– Caution, in some cases, the drain plug is mounted with an inverted pitch. In any case, never force it more than necessary.
4. Dispose of the used oil
Once the cap is unscrewed, the oil flows more or less slowly.
– Open the engine oil filler on top.
5. Remove the used filter
– Unscrew the old filter using the special strap or claw wrench.
– If you don’t have a special wrench, you can sometimes do it by hand. You can also drill through the filter with a screwdriver and use the handle to loosen it.
The filter cartridge
The filter is in a specific receptacle where only the filter can be changed. Here is the procedure:
– Remove the cover.
– Remove the used filter and gaskets.
– Clean the receptacle.
– Position the new gaskets by lubricating them lightly.
– Place the new filter.
– Close the cover.
6. Clean the plug
Remove the old cap gasket.
– Clean the plug and its thread.
– Position the new gasket.
– Clean the filter area by removing the old gasket that may have stuck.
– Run the equivalent of a glass of new oil through the filler cap to remove any remaining residue.
7. Screw the filler cap back on
– First, screw the cap back on by hand. You should not encounter any resistance. If it is the case, it means that the cap can be put at an angle. Reposition it and start screwing again.
– Using the wrench, tighten the cap. After the first resistance, turn the cap for no more than half a turn.
8. Install the new filter
– Oil the gasket of the new filter if it is not pre-oiled.
– Position the new filter and tighten it by hand.
– Finish with the wrench without forcing. If you don’t have a specific wrench, choose large multi-socket pliers and protect the filter as much as possible with the cloth.
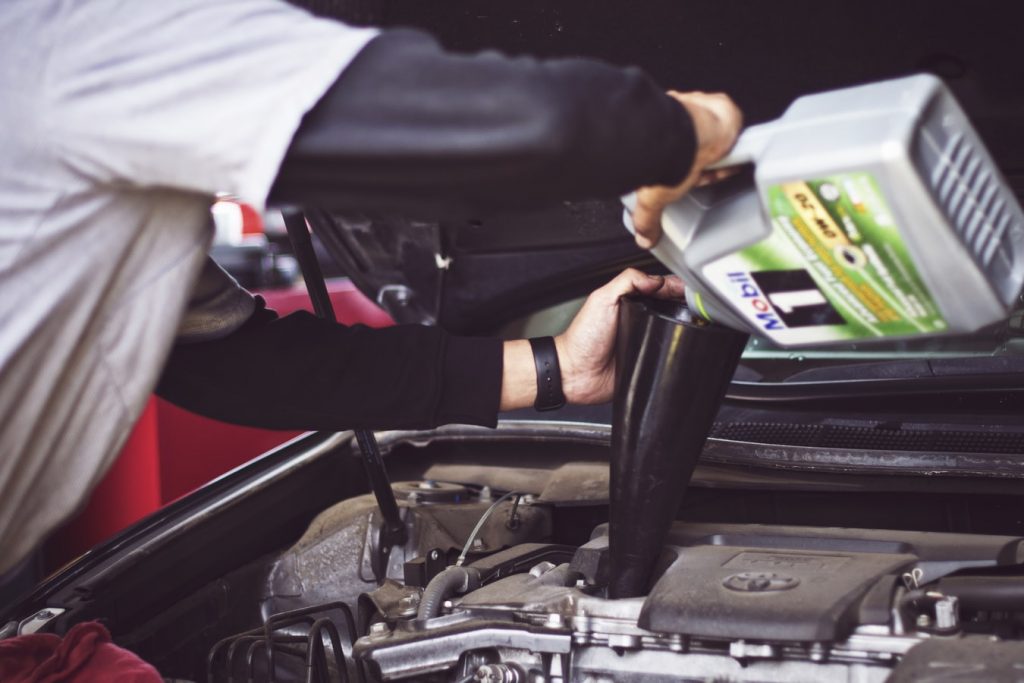
9. Fill the oil tank
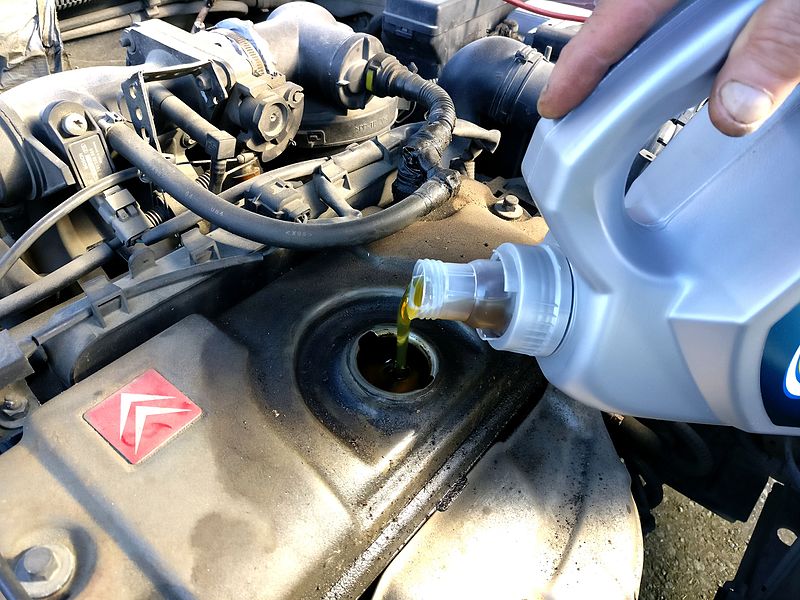
Using a funnel, pour the new oil into the reservoir. The capacity to be filled is often indicated near the filler cap. If this is not the case, refer to the car’s service manual. Fill only 3/4 of the capacity.
– You can use a graduated container or use the graduations on the oil container.
– If you overfill, use a syringe to draw off the excess.
– Replace the cap.
10. Start the engine
Please turn on the ignition and start the engine by letting it idle for a few minutes.
– The oil indicator light on the dashboard will go out.
– Let it rest for a few moments.
– Use the dipstick to check the oil level and add oil in small increments.
– Check the gasket and filter for leaks.
– Refit the engine guard and remove the spark plugs.
11. Recycle your oil
– Put the used oil in a container and take it, together with the filter, to the waste disposal site or possibly to the person from whom you bought your oil (except for supermarkets).
– Do not store your oil in your cellar or throw it down the drain.
Now, you are done. Please, remember to comment and share this post.

2 thoughts on “How to Change Engine Oil”