Contents
Step 1: Identify the problem
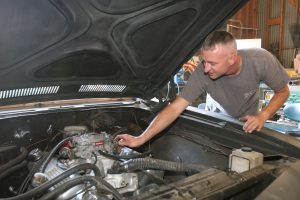
Step 2: Prepare your vehicle to access the bellows
Step 3: Remove the steering knuckle and rack and pinion bellows
Step 4: Install the new rack and pinion bellows
Step 5: Continue reassembly
Where can I get a mechanic?
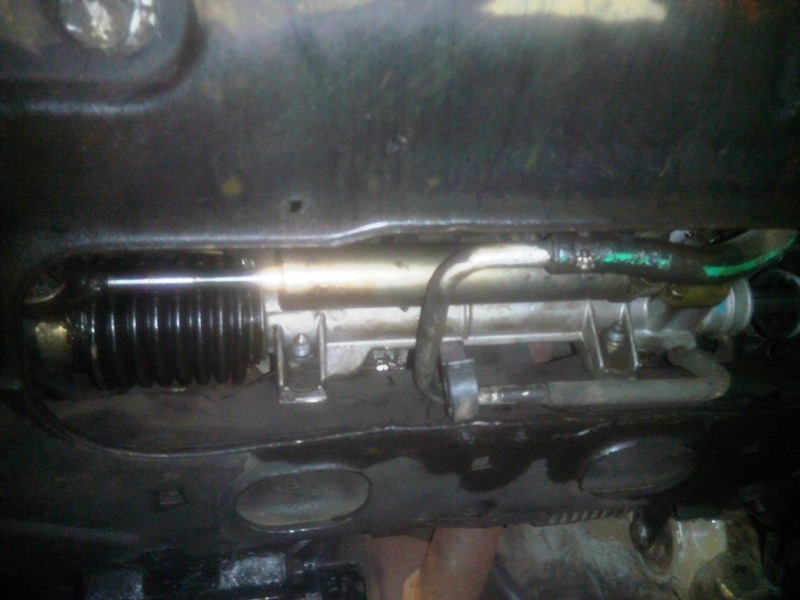
The rack and pinion bellows are soft plastic sleeves that protect the steering rod (or rack) from water and dirt. This protection must be in good condition and airtight to ensure the safety of the vehicle’s steering.
It is a relatively simple operation, using a systematic and rigorous procedure. One of the only difficulties is the accessibility of the bellows, more or less accessible depending on the car.
Follow this step by step guide on how to change the rack bellows.
1. Identify the problem
The steering rack is usually attached to the engine cradle and is connected to the wheels by tie rods and ball joints.
It has two steering bellows, one on each side.
The rack is driven by the steering column and is connected to the steering wheel.
Check the condition of the bellows.
Look carefully at the two steering bellows once you have located the steering rack.
If they are punctured, cracked or torn, you must replace them.
2. Prepare your vehicle to access the bellows
Start by lifting your vehicle and removing the wheel that has the bellows to be replaced.
Place your car in a flat, stable area.
Apply the handbrake.
Put a chock on the rear wheel opposite the side to be lifted.
Raise the front on the side of the bellows to be replaced with a jack.
Add a support stand under the vehicle to secure your workstation.
Remove the wheel.
3. Remove the steering ball and rack, and pinion bellows
Turn the steering so that the steering ball is as far out as possible.
Loosen the lock nut on the steering tie rod with the correct size open-end spanner, giving a sharp tap in the direction of loosening (anti-clockwise).
Important: In a few rare cases, this is a left-hand step. In this case, the loosening is clockwise.
Spray the steering knuckle nut with a degreaser and then loosen it.
If it is difficult to loosen, retighten and loosen the nut several times, soaking the part with the release agent.
Use a ball joint remover to release the ball joint that is conically pressed into the hub mounting.
Good to know: If you do not have a ball puller, place a large hammer against the hub eyelet where the ball is pressed in. With a smaller hammer, strike sharp blows on the opposite side in a rhythmic manner (be careful with the ball joint thread). If done correctly, this action will unlock the ball joint.
Before unscrewing the ball from the link, bring the locknut into contact with the link and mark the position of the nut to the ball with paint.
This precaution allows the ball joint to be precisely repositioned in the connecting rod when reassembling, avoiding a costly wheel alignment.
Unscrew the ball joint. If its thread is seized, heat it with a gas torch or, better still, with an oxyacetylene torch.
Remove the ball joint.
Remove the two clamps and remove the defective bellows.
4. Fit the new rack bellows
Important: Before refitting the bellows, check that there is no play in the tie rod and the steering ball joint.
Clean any dirt from the steering rod and the outer link part so that the new bellows will not be dirty when you fit them.
Grease the steering bar.
Oil the bellows.
Refit the bellows and tighten the two clamps.
Good to know: the clamps are usually supplied with the bellows.
5. Continue reassembly
Reverse the steps for reassembly.
Replace the screwed-in ball joint in the same position as during disassembly.
Tighten the ball joint nut, the tie rod lock nut and the wheel to the torques specified in the vehicle’s technical journal. The average torque values for a car are:
5 daN.m for the tie rod lock nut;
3 to 4 daN.m for the steering knuckle nut;
8 to 10 daN.m for the sheet metal rim;
9 to 12 daN.m for the aluminium rim.
Important: if the ball joint turns in its housing, press it with a lever while leaning on the frame.
Check the tightness of all the fasteners.
Good to know: Do not put away the corresponding tool until the tightening is done. If in doubt, always check again.
Put the vehicle back on the ground and carry out a test run.
Below you will find a list of the materials needed to change a rack and pinion bellows.
Checklist
Rack and pinion puller
Torch
Cloth
Hexagonal spanner
Torque spanner
Flat spanner
Jack
Release agent
Disposable latex gloves
Grease
Hammer
Can I get a mechanic instead?
Not feeling confident to DIY this task? Don’t worry; you can call Seeker Motorsport in Clayton. They’ll get the job done for you. Please, remember to share your experience in the comments below.
Read more:
– My Car Is Overheating! What Could Be Wrong?
– What Is Ignition Advance System?