
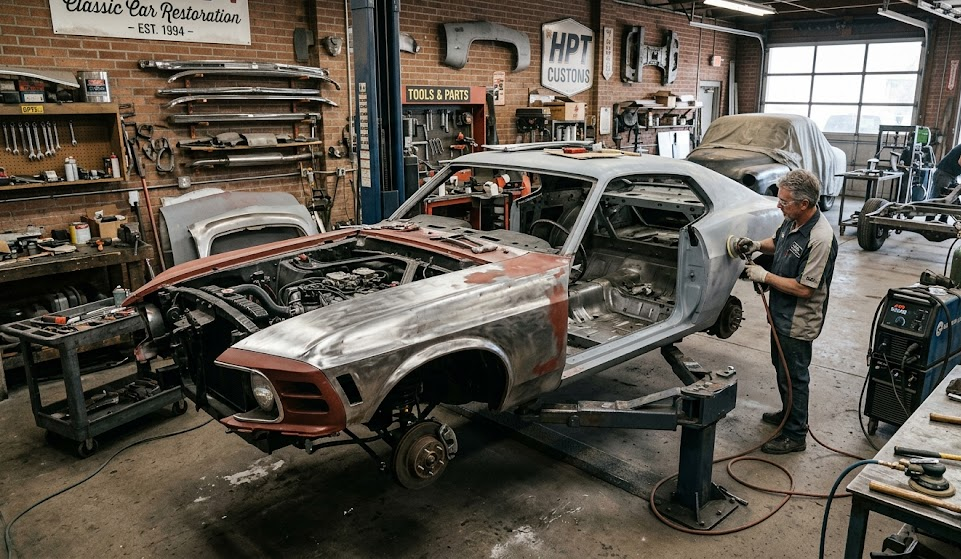
Restoring a car can transform a worn-out vehicle into a stunning gem that reflects both artistry and skill. This article explores the essential stages of an auto body restoration project, guiding you through the journey from initial assessment to the final touches that create a breathtaking masterpiece. By understanding these key steps, you will be equipped to tackle your restoration project with confidence and foresight.
Planning Your Auto Body Restoration Project
Proper planning is the foundation of any successful auto body restoration project. It encompasses everything from setting a budget to evaluating the vehicle’s condition, all of which set the stage for your undertaking.
Assessment of the Vehicle’s Condition
The first step involves a meticulous assessment of the vehicle. Identify any structural damage, rust, or other imperfections that require attention. Documenting these issues will help shape your restoration plan and budget.
Setting a Realistic Budget
Creating a budget is vital. Estimate costs for parts, labor, and any unforeseen expenses. Tools are also part of your financial planning; acquiring everything necessary can prevent unexpected costs down the line. Be wise about your financial choices to avoid overspending.
Selecting the Right Vehicle
Choosing the right car is essential. Look for a vehicle that meets your restoration goals and fits within your financial plan. Assess its condition carefully, considering how manageable the repairs will be. The right choice simplifies your project and enhances your enjoyment.
Establishing a Workspace
Before diving into restoration, set up a dedicated space. This area should be organized and equipped with all the necessary tools. A well-prepared workspace makes it easier to tackle each phase of the restoration efficiently.
Preparing the Vehicle for Restoration
Once the planning phase is complete, you can proceed to prepare the vehicle. This stage ensures that you’re ready to move forward effectively, focusing on both disassembly and initial repairs.
Disassembly of the Vehicle
Carefully disassemble the vehicle, noting the placement and condition of each part. This documentation aids in easy reassembly later on. A thorough disassembly also gives you access to hidden areas that may need attention.
Purchasing Quality Parts
Make a list of parts needing replacement or repair. It’s important to purchase high-quality components that fit your vehicle’s make and model perfectly. Quality parts ensure longevity and enhance the vehicle’s overall aesthetic appeal.
Repairing Engine and Transmission
Your engine and transmission might require professional servicing. Consider reaching out to trained mechanics who can ensure these critical systems are in top shape before reassembly.
Bodywork and Painting Restoration
Bodywork and paint restoration plays a significant role in transforming the vehicle. This part demands finesse and precision, enabling you to breathe new life into the exterior.
Sanding and Rust Removal
Begin by removing the old paint through sanding or using chemical strippers. Select a method based on the paint’s condition. Removing rust is vital for preventing future damage; methods include sanding or grinding to get to clean metal.
Priming the Surface
After sanding, it’s time for priming. Apply a suitable primer that adheres well and prepares the surface for painting. A good primer enhances the finish and durability of the paint.
Painting the Vehicle
Use high-quality paint for the base coat and finish with a clear coat for added protection and gloss. Pay attention to application techniques, as a flawless coat makes a noticeable difference in the outcome.
Polishing for a Stunning Look
Once the paint has dried, polishing is the final touch. This process will bring out the shine and depth of the color, making your vehicle look brand new.
Final Inspection and Reassembly
After completing the bodywork and painting, conduct a thorough inspection to ensure every detail is perfect. This final review is crucial before you put everything back together.
Detailing the Completed Project
Once reassembled, don’t skip the detailing step. A comprehensive cleaning will ensure your hard work shines. Aim for every nook and cranny to be addressed, resulting in a presentation-worthy car.
Enjoying Your Hard Work
With reassembly complete and detailing done, you can now enjoy the fruits of your labor. The satisfaction of seeing a revitalized vehicle on the road is unmatched, making the entire process worthwhile.
In summary, the stages involved in an auto body restoration project require dedication and meticulous attention to detail. Each phase, from planning to final checks, adds value and beauty to your vehicle. By following these steps, you can embark on a rewarding journey of transformation and craftsmanship. For extensive guidance, consider exploring resources that offer expert tips and detailed guides to enhance your restoration skills further. You can refer to these professional techniques for more insights.

