Embarking on the journey of changing rack bellows in your vehicle can seem like a daunting task, but with the right guidance, it becomes a rewarding endeavour. In this comprehensive guide, we’ll take you through the step-by-step process, offering insights and tips for a successful rack bellow replacement. Whether you’re a seasoned DIY enthusiast or a Canadian car owner looking to delve into auto maintenance, this guide is tailored to empower you on this mechanical journey.
Getting Started with Your Tools
Gathering Necessary Tools
Before you dive into the replacement process, ensure you have the right tools on hand. This typically includes a car jack, jack stands, wrenches, pliers, and a rack bellow kit. Having the appropriate tools at the outset sets the stage for a smooth operation.
Ensuring Safety First
Safety should always be the top priority. Wear protective gear, including gloves and safety glasses. Additionally, make sure your vehicle is parked on a flat surface, and the parking brake is engaged. If you’re using a car jack, ensure it is positioned securely under the vehicle.
Removing the Old Rack Bellows
Lifting the Vehicle
Use the car jack to lift the front of your vehicle, providing access to the steering rack components. Secure the vehicle on jack stands to ensure stability during the replacement process.
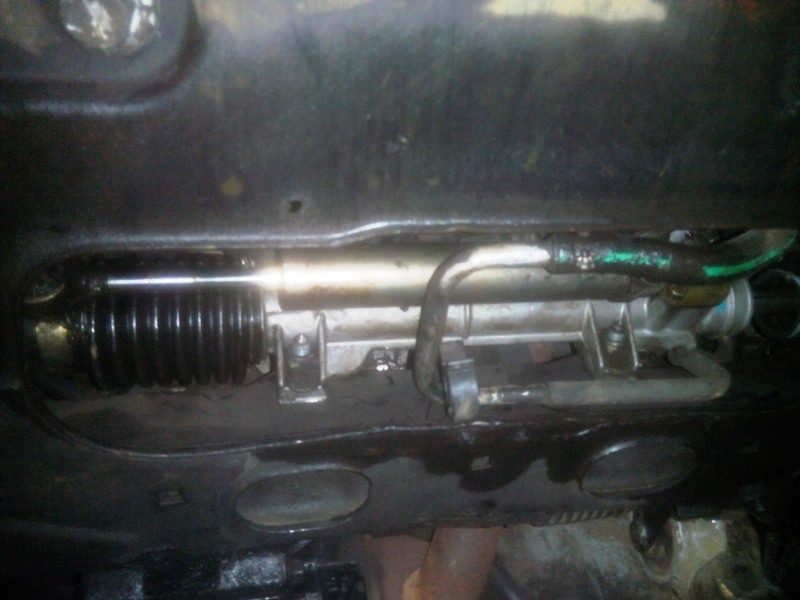
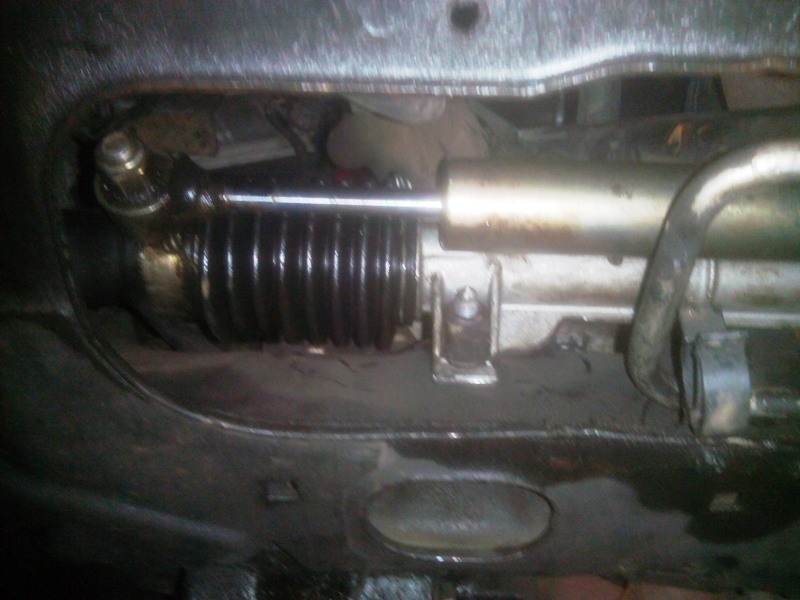
Locating the Rack Bellows
Identify the location of the rack bellows, typically on either side of the steering rack. These flexible accordion-like components protect the steering rack from debris and contaminants.
Removing Tie Rod Ends
Detach the tie rod ends connected to the steering knuckles. This can be achieved by removing the cotter pin, loosening the castle nut, and employing a tie rod end puller. Once disconnected, set the tie rod ends aside.
Extracting the Old Bellows
With the tie rod ends removed, you can now slide the old rack bellows off the steering rack. Take note of any residual grease or debris around the area and clean it thoroughly.
Installing the New Rack Bellows
Preparing the New Bellows
Inspect the new rack bellows from your replacement kit. Ensure it matches the specifications of your vehicle’s make and model. Slide the new bellows over the steering rack, positioning it in the same location as the old one.
Reattaching Tie Rod Ends
Reconnect the tie rod ends to the steering knuckles. Tighten the castle nut securely, and use a new cotter pin to ensure a stable connection. Ensure the tie rod ends are properly aligned to prevent any issues with wheel alignment.
Securing the Bellows in Place
Secure the new rack bellows in place using the provided clamps from the replacement kit. Double-check the positioning to guarantee a snug fit and protection for the steering rack.
Finalizing the Replacement
Lowering the Vehicle
Carefully lower the front of your vehicle using the car jack. Remove the jack stands and ensure the vehicle is securely positioned on the ground.
Checking for Leaks
After the replacement, inspect the rack bellows and the surrounding area for any signs of leaks or abnormalities. Address any issues immediately to prevent complications down the road.
Conducting a Test Drive
Take your vehicle for a test drive to ensure that the steering operates smoothly and there are no unusual sounds. Pay attention to any vibrations or irregularities that may indicate a need for further adjustments.
A Revitalized Ride
Steering into the Future
In conclusion, changing rack bellows is a manageable task with the right tools, knowledge, and attention to detail. By following this comprehensive guide, you’ve taken a proactive step in maintaining your vehicle’s steering integrity. A revitalized ride awaits you as you navigate the roads of Canada with confidence in your DIY auto maintenance skills.