The cylinder head gasket forms a tight barrier between the oil, coolant and combustion chambers in your engine. If it overheats, it can crack or deform. Your car’s engine is then in danger: the cylinder head gasket must be replaced. This is a costly operation in the garage, as many engine parts have to be dismantled to reach the cylinder head. Take your time and find out how to change a cylinder head gasket yourself.
Caution: changing a cylinder head gasket is a delicate operation. It is a repair that only experienced mechanics should only carry out.
1. Diagnose a head gasket that needs replacing
There are 3 signs that your car’s head gasket needs changing:
– The oil is white, forming a sort of “mayonnaise”: there is coolant (water) in the oil.
– A thick white smoke comes out of the exhaust: water vapour. This means that water is flowing into the cylinders.
– The water hoses are rigid, or water is coming out of the expansion tank cap: this is the pressurised gas mixture in the combustion chambers flowing into the cooling system.
All these symptoms indicate a damaged cylinder head gasket. Stop quickly to avoid overheating the engine.
2. Get the materials you need to repair the head gasket
Along with your head gasket, also order :
– a new timing kit (timing belt + tensioners and possibly a water pump): you will have to change the timing belt when you reassemble it;
– a break-in bag with all the seals for the top engine;
– and new cylinder head screws.
It would help if you also have your vehicle’s technical review to help you find the exact location of the parts to be dismantled according to your car model.
3. Drain the cooling system
– Locate the drain cock under the radiator on the ATR.
– Place a basin underneath.
– Open the drain plug located at the lowest point of the radiator, and let the coolant drain out. You can also open the expansion tank so that the coolant flows faster due to the airflow created. Some cars do not have a drain plug on the radiator. In this case, disconnect the lowest water hose.
Note: To change the head gasket, you do not need to drain the coolant in the lower engine (2nd drain plug) unless the coolant has gone into the oil (the famous “mayonnaise”): in this case, you will need to drain and clean everything.
– Then, remove the cooling system components connected to the cylinder head: water hoses and sometimes the clinostat (depending on the vehicle).
4. Clear the access to the cylinder head
Use the vehicle’s technical review to remove any engine peripherals that obstruct access to the cylinder head. Engines are mounted differently depending on the type (diesel or petrol), make and model. Depending on the case, you must remove :
– the ignition coil ;
– the injector rail
– the electrical connections;
– the air filter;
– the alternator belt and the dumper pulley.
Some tips when dismantling:
– Allow space to place the parts in the order of disassembly without mixing them up.
– Store the corresponding nuts and bolts in plastic jars or boxes. Or, if possible, reassemble them directly on the disassembled parts: you will then know their exact location when reassembling.
– Take photos of complex wiring or connections before dismantling so that you can refer to them when reassembling.
5. Uncouple the cylinder head cover
Once the ancillary parts have been removed, you will need to remove the exhaust manifold, which concentrates the exhaust gases from the various combustion chambers to the exhaust line.
To do this:
– Using a socket spanner, unscrew the nuts that hold it to the cylinder head.
– If the nuts are jammed, spray some degreasing oil and leave it for a few minutes. The exhaust line screws can be significantly damaged.
– If you still can’t remove the screws between the exhaust manifold and the exhaust line, cut them off. You can replace them with new ones when you reassemble.
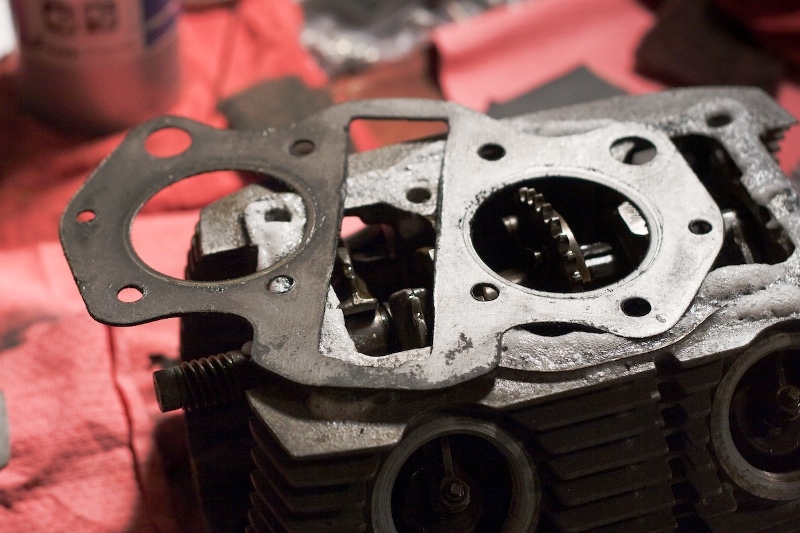
– Then, remove the gasket. Replace it with a new one when reassembling.
6. Remove the intake pipe
Also known as the intake manifold, the intake pipe is the part that sends air into the engine for fuel combustion.
Again, remove the nuts, remove the intake pipe and replace the gasket on reassembly.
7. Shim the engine
– You will now remove the timing belt. Before doing this, you need to wedge the engine in the correct position to run correctly after reassembly.
– Use a spanner at the end of the crankshaft to turn the timing belt by hand and align the marks on the crankshaft, camshaft and injection pump (for diesel cars), then insert the timing pins. You can find the exact location and number of pins in your vehicle’s certificate.
– Then, loosen the tensioner to loosen the belt and remove it without forcing it. As you will replace it, you can also cut the belt with a cutter to save time.
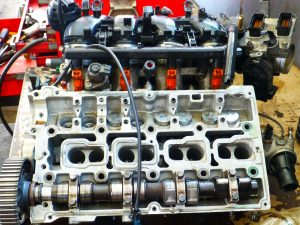
8. Unscrew the cylinder head
When unscrewing a cylinder head, it is important to respect an order of loosening so as not to warp it. This would render it permanently out of order.
– Start by removing the rocker cover.
– Then, loosen the cylinder head screws. The order of tightening the screws is indicated on your vehicle’s certificate: loosen them in the opposite direction.
– Proceed in small steps (first loosen each screw a little, then loosen a second time and finally the last time to remove them altogether). These are pretty long screws.
– Then remove them and take off the cylinder head, then the gasket. Sometimes the crack is so small that it is not always visible at first glance.
Note: If the gasket is badly damaged or driven for some time before changing it, you should have the cylinder head checked for flatness while dismantling. This cylinder head gasket surface check is carried out in a specialist workshop. You can then reassemble your rectified cylinder head, but the thickness of the gasket will not be the same.
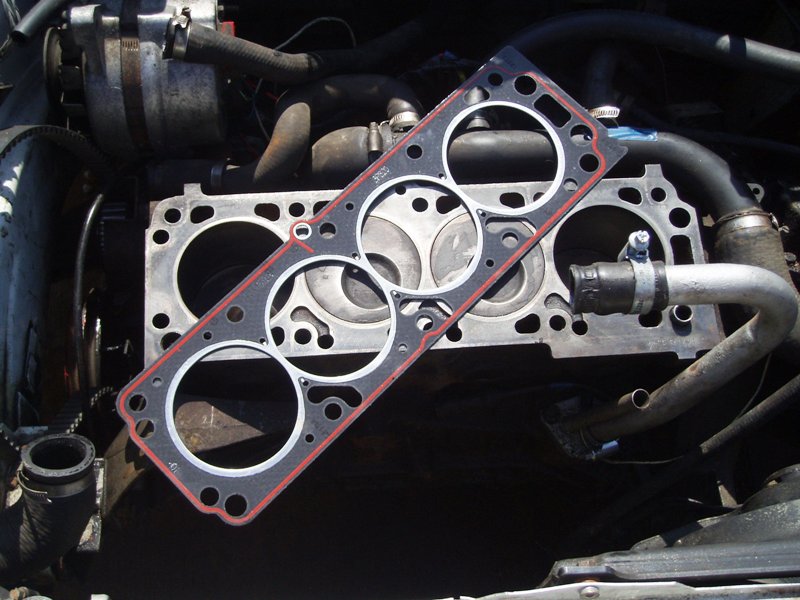
9. Replace the cylinder head gasket
– Clean the gasket surface with a cloth soaked in solvent, such as acetone.
– Place the gasket on the gasket face. A top/top marking or a colour helps you position it in the right direction. The holes and shapes must match perfectly.
Warning: there are several thicknesses of cylinder head gasket for the exact vehicle. If you do not have your cylinder head ground at the disassembly time, check that you are reassembling precisely the same thickness of the gasket. If your cylinder head has been ground, ask the workshop for the part number of the gasket to be refitted.
10. Refit the cylinder head
When refitting, use new cylinder head bolts, as the old ones may break.
As with disassembly, be sure to tighten the cylinder head bolts in the correct order. Also, check the torque and angle of the cylinder head bolts; this is very important.
– Oil your screws.
– Start by screwing them in by hand, in the recommended order.
– Then, make a second pass with a torque spanner to tighten them to the torque recommended by the manufacturer.
– Then, go back (still in the same order) with a torque spanner to finish tightening: this can be one or two passes at 90°, for example.
11. Refit the rest of the components
Refit the timing belt and peripherals in the reverse order of disassembly. Remember to manually check that the engine is running correctly after reassembling the timing belt. Replace all the gaskets in the upper engine you removed with new ones (exhaust and intake manifold gaskets).
It is also advisable to change the water pump if caught on the timing belt. A new timing belt tension could cause the water pump shaft to break.
12. Refill the engine with water
Once all the components have been refitted, refill the cooling system:
– Close the radiator drain plug.
– Fill with coolant.
– Close the plugs.
– Start the engine and let it warm up for about ten minutes until the fan starts.
– With the engine still running, bleed the system by opening the bleed screw at the top of the radiator to remove air from the system.
– Then, top up the coolant when the engine is cold.
13. Check the engine operation
When you start the car, check that the engine is running smoothly: you should not hear any suspicious noise. If not, switch off the engine immediately and contain everything you have dismantled.